
This article shows how to install the SCR-610 Radio on the Passenger side of the WWII Willys MB or Ford GPW Jeep


|
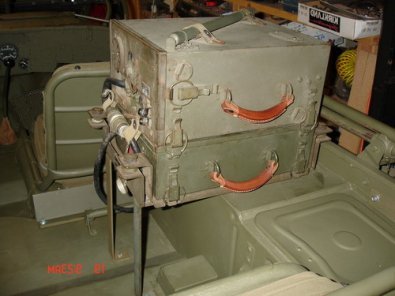
1. The BC-659 is one of the smaller WWII radio's that were installed into jeeps. The radio can be found on either side of the jeep. This article will show one approach on how to install the jeep radio on the passenger side of the WWII Willys MB or Ford GPW jeep. |
|
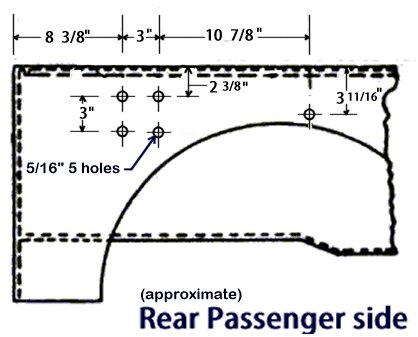
2. To start, the radio antenna mount and base will be installed. These are the dimensions that were used to install the radio base mount and brush gaurd. You may need to adjust these slightly based on the back handle position. |
|
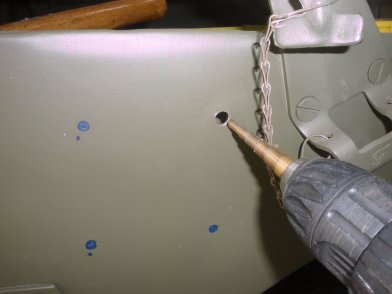
3. After marking the holes based on the dimensions above, drill out the holes one at a time, checking the alignment with the MP 50 base after each hole is drilled. |
|
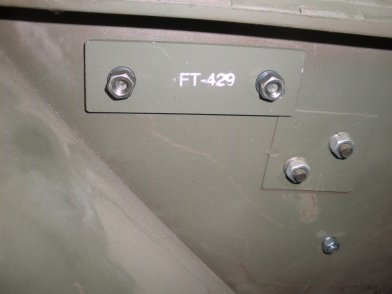
4. Here you see all four holes are drilled, and the 5/16in-20 x 3/4in bolts are installed. Note: you need the FT 429 backing plates to hold the weight of the mount and antenna base |
|
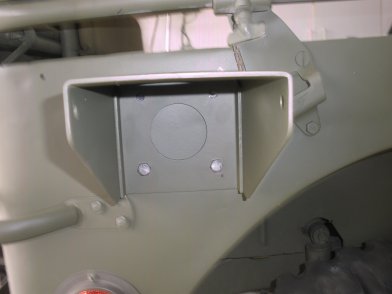
5. Here you see the FT 429 top back plate installed on the inside of the tool box compartment. |
|
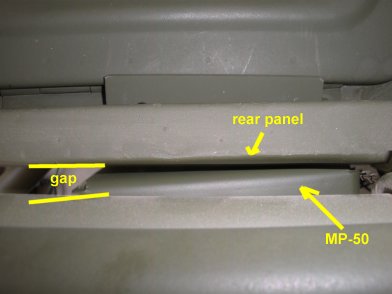
6. Note: you might find that when you put your MP 50 against your rear panel that there is a gap. No worries though, when you tighten up the bolts/nuts the panel will come together nicely. |

|
7. Here you see after tightening, the panel and base mount nicely together. |
|
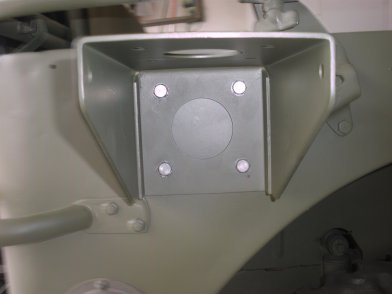
8. After putting the FT 429 back plates on and tightening the bolts, the MP 50 looks good on the rear panel. |
|
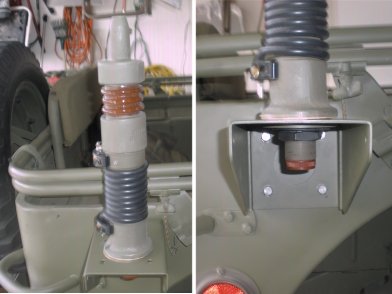
9. Placing the antenna base on the MP 50 and tightening it looks good. You can tell by the weight, that the FT 429 plates are needed for supporting the weight of both items. |
|
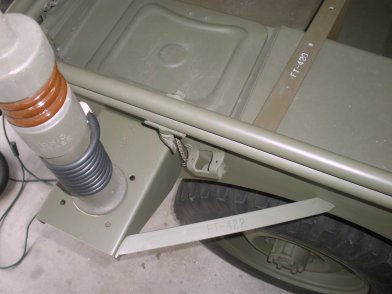
10. Here the FT 422 brush guard was slightly modified for the passenger side. |
|
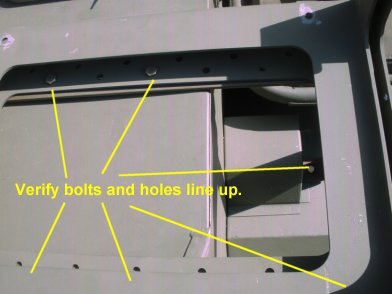
11. Here you see the brush guard hole was drilled out and bolts lined up. You will note, that the brush guard is slightly positioned downward. |
|
12. Here is a look from the bottom side prior to cleaning up and painting. The bolts for the brush guard are slightly smaller in length than the others. Here 5/16-20 x 5/8 where used. |
|
13. Here the FT 422 brush guard is painted and installed. |
|
14. A top view of the brush guard installed |
|
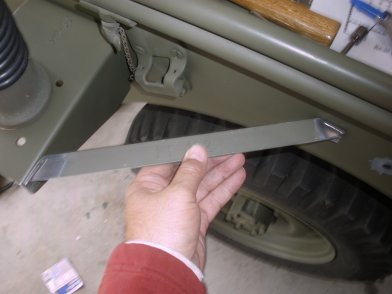
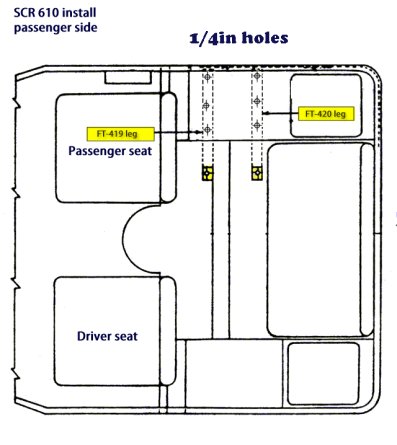
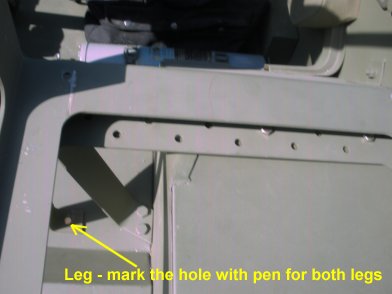
15. Next, we are going to turn to installing the legs. Here is the top view of the 1/4in holes we are going to drill. The mounting legs are different lengths do to the level of the floor, so you see where you have to place them. |
|
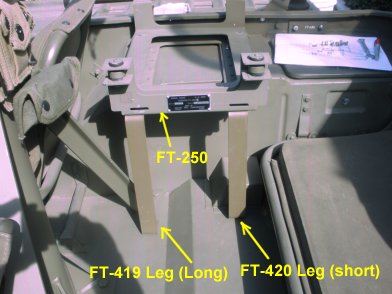
16. Here we get an idea of where the mount will be placed with the legs. Temporarily, place the legs and FT-250 mount into position. Now you have an idea of where the legs will be mounted. Because the legs are different lengths, you really can't go wrong on the placement of the legs. |
|
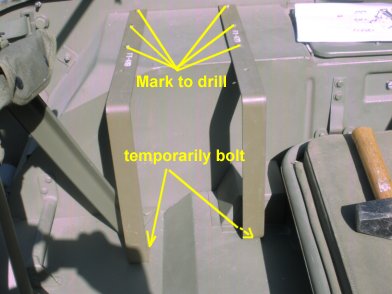
17. To help align the hole positions, we turn the FT-250 mount upside down, and take a couple bolts and bolt to the FT-250 mount to hold in position. |
|
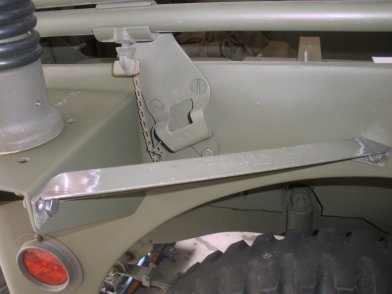
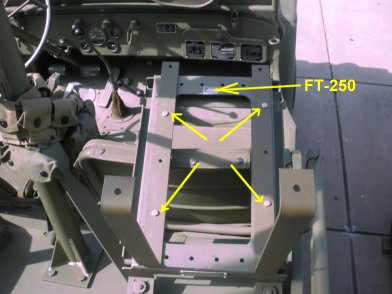
18. With the FT-250 mount tempoarily bolted to legs, place the unit on the wheel well and align it to where you want to position it. Remember, this install is on the passenger side so if you install on the driver side it is just the mirror of what is shown here. When you have in the position you want, mark the holes on the rear floor for drilling. It is a 1/4in hole you will be drilling. |
|
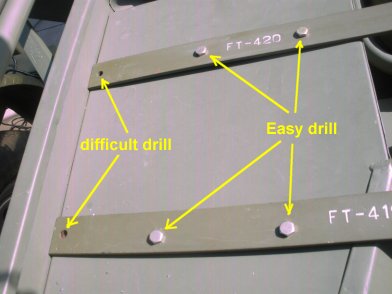
19. With the floor holes drilled, temporarily bolt the legs in position. Then place the FT-250 mount back on the legs to mark the holes on where to drill. Tip, if you line up the leg toward the seat, drill that leg first and place the FT-250 mount back on legs to line up the other side. |
|
20. You will find that the middle holes are easily drilled and lined up. But the back holes are a little difficult because it is slightly under the edge of the tub. For the difficult drill, you can start with a small drill for the hole to start, then finish from the bottom side. |
|
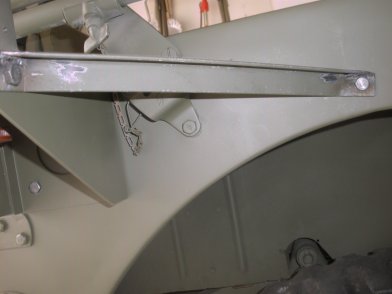
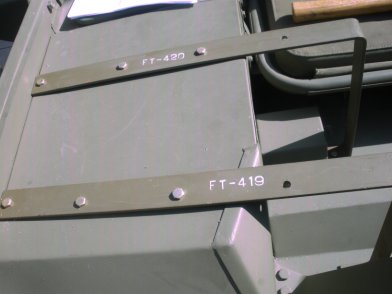
21. With the holes drilled, you can take your 1/4in bolts and verify your holes are lined up. |
|
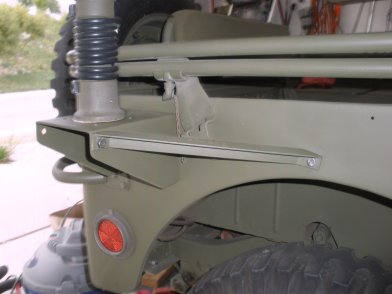
22. Now you can test your holes with the FT-250 mount and the bolts lining up. Once you verify they line up, you can paint the legs up. |

|
23. MORE TO COME... 2/20/2012 |

|
24. |

|
25. |
