
This article shows how to make your own pair of spark plug wires that are more reliable than the repo pair yet still look correct for your WWII Jeep


|
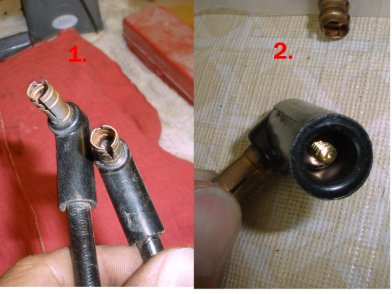
1. I have been very frustrated with the typical REPO spark plug wire set. Althought they might look correct, the quality is pretty poor. I have had three sets of the repos, and there are two things that drive me nuts. |
|
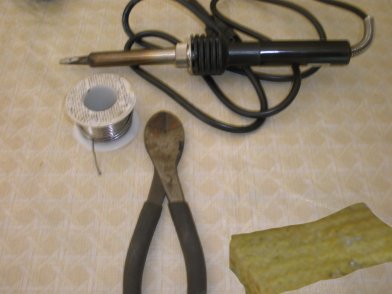
2. You need the following tools for this task: |
|
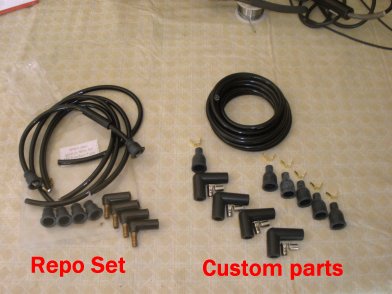
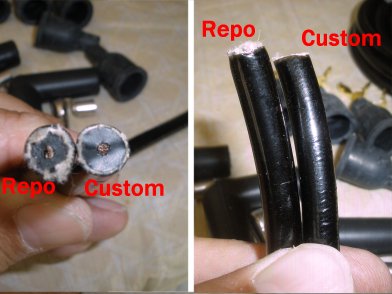
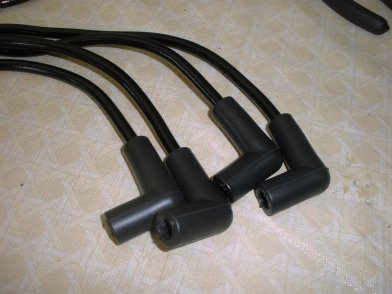
3. Before we get into how its done, here is a comparison picture. Repo sets have vinyl wire (as they were in the 40's) connectors, and caps. |
|
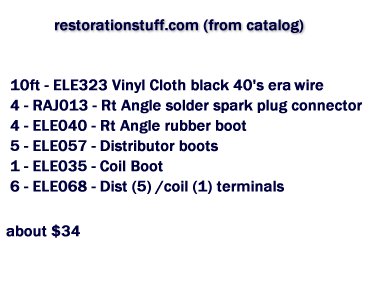
4. Here is the RestorationStuff parts list. It is a little less that the REPO kit, but when your done making them they will be solid. In addition, by making your own, you can add about 1/2in on the wires so they are not so tight (fit to your desire). The other part I really like is the right angle rubber boot. If you have had sparks flying all over from your plugs, you will love this enhancement (yet looks close to original) |
|
5. If you compare the wire from the REPO to the CUSTOM version, they are nearly the same. Which is good. If you restore your engine, you want it to look good with the 40's vinyl cloth wiring. |
|
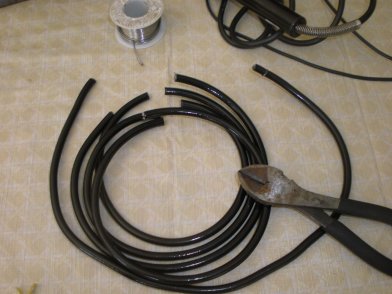
6. To start, cut your wires. I will give you the lengths that are in the Repo kit, and you can add as much as you desire. I added about 3/4in to each of my wires. |

|
7. Next, seperate your spark plug wires from your coil wire. Here we want to put the right angle boot over the wire (either end). You will pull this over the connector once it is soldered on. |
|
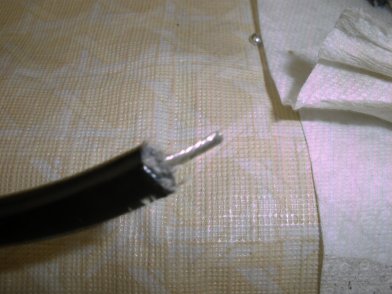
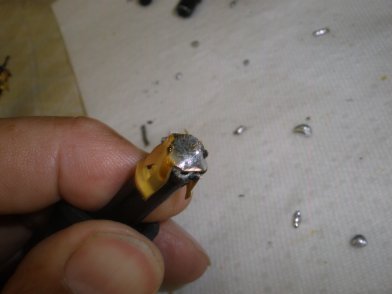
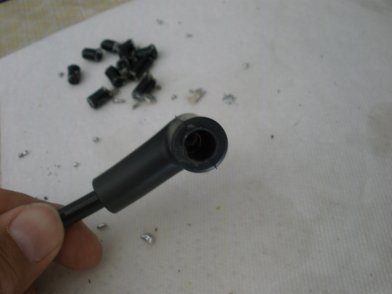
8. Next, snip about 1/4in of each side of the wire. Twist the core wire so it is nice and tight. We will add a little solder in a minute to keep it tight. |
|
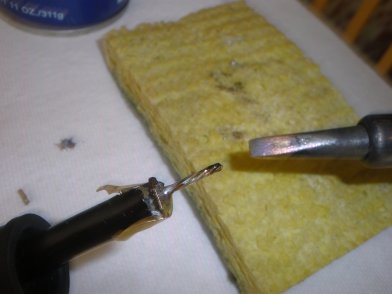
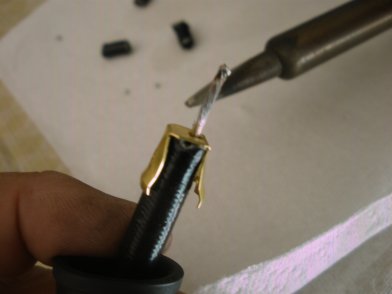
9. Now get your sponge wet (for wiping the soldering iron off), and heat your soldering iron. Place the iron on the back side of the wire for a moment, then add your solder lightly. The wire should suck it right up. Do not add a lot of solder... should be just enough to keep wire together. |
|
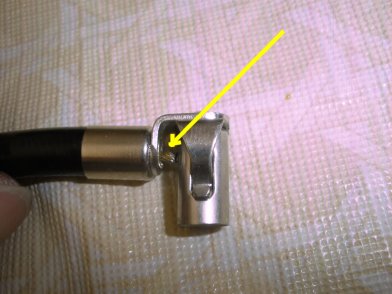
10. Now get your right angle connector and place it on the end where your rubber boot is located. The yellow arrow shows where you will apply solder. Because you already have solder on the wire, this should bond very nicely. |
|
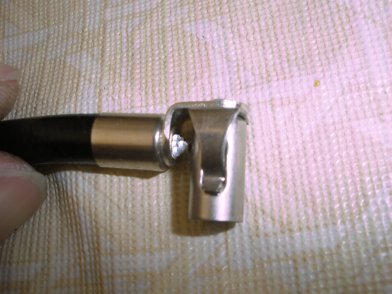
11. Becareful with this soldering. The connector can get very hot from the iron... so be careful not to touch it with your hands. Place the iron behind the connector and add the solder from the front side. You want the solder to bond to the wire and connector. It should mound up. |
|
12. Now prepare the other side of the wire(s) with the terminal connector. You will do this some thing to both sides of the coil wiring (remember to put the boots on the coil wire first!!). Place the terminal connector over the wire and add the solder on the top. Once cool, cut the excess as this should be fairly flat. |
|
13. The terminal connection should be close to flat, so if you have a mountain, cut the wire back and file it down. Do these same steps to both sides of the coil wire (and put the boots on first) |
|
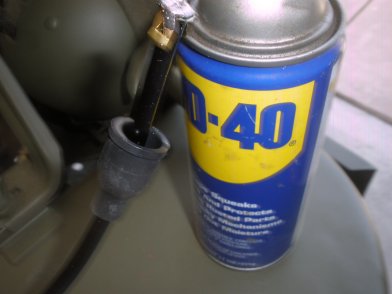
14. Now that the soldering is complete and cooled off, spray some WD 40 into the right angle boot, and pull it over the connector. You have to work this a bit, but it works out pretty well. If your right angle connector spins, then you didn't get a good solder and you may want to try it again. |
|
15. Wires shiould be done at this point and ready to install. |
|
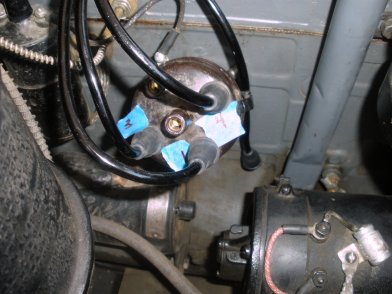
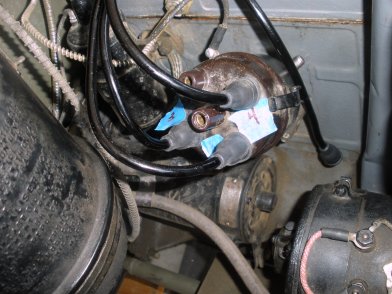
16. Before taking your old wires off, mark the distributor with which wire goes where. This will help when you start putting the wires through the Air Cleaner Tube. The firing order is 1-3-4-2 so feed the wires through the air cleaner tube in that order. |
|
17. Once you bring each wire through the air cleaner tube, place your last distributor boot on your wire. Note spray the boot with WD 40 to help it slide on, wipe off excess. |
|
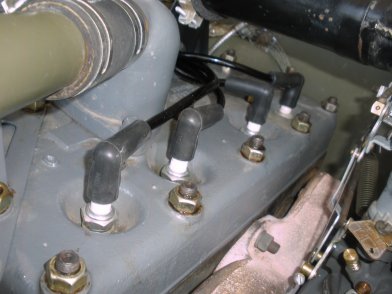
18. As you feed each wire through the air cleaner tube, connect to the marked distributor so that the wires don't get all tangled up, or worse yet, you put the wrong wire on the wrong spot on the distributor. |

|
19. When done, you can adjust wires through the air cleaner tube, moving the wires to your desired length. |
|
20. When your done, your jeep should fire up really well. I love the way these worked out. Much stronger spark, and plugs are covered well and no irratic sparks flying around. |
