
This Article describes how to install new U Joints via propeller shafts for your WWII Jeep . Applies to 1942,42,1943,43,1944,44,1945 Jeeps models


|
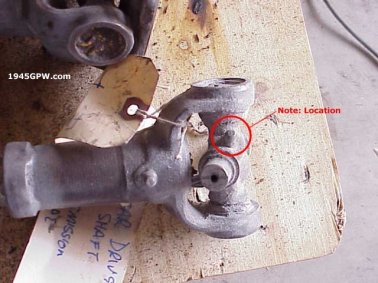
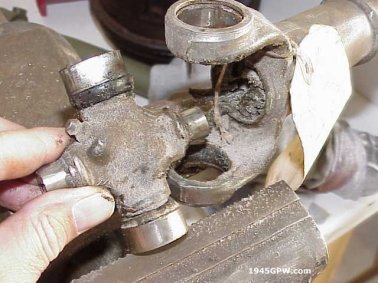
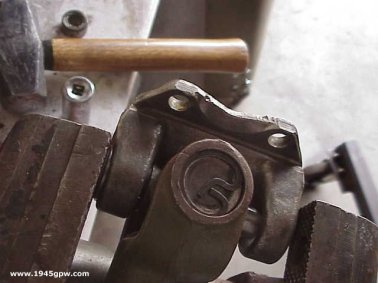
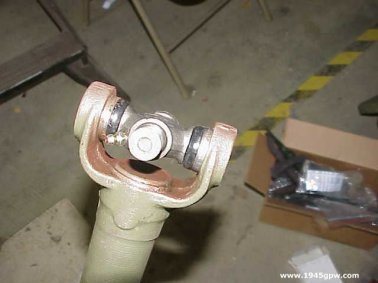
1. If you acquire a restoring project, you will most likely need to replace your u-joints. First, be sure you note where the location of your zerk fittings are (this picture shows the INCORRECT placement. the zerk should point toward the shafts). If you install these upside down they will be a bear to grease. |
|
2. To pop the rings out, I used a screwdriver, and worked them away from the outer rim. They will pop right out. |
|
3. Once the rings are out, I put the shaft in a vise, and tapped the ujoint out by pounding out the spider ujoint. Use a Brass Hammer and a couple pounds and it will pop out. Make sure the clip is out on both sides |
|
4. Pound it all the way out, until you can manuver it out of the shaft. |
|
5. You can manuver these out once you pound it out. |
|
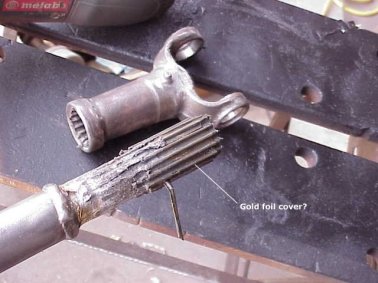
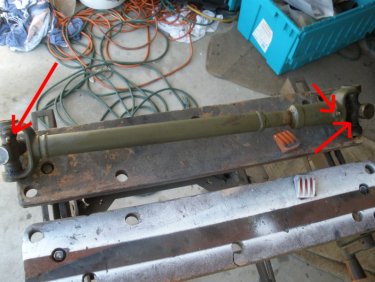
6. Once I got the ujoints out, I pulled the shaft apart and inspected the gold covering sheet that is on the inside. After further inspection, and this shim removed, it was obvious I needed to replace the front drive shaft. I located one from Northern California which was nice and tight. |

|
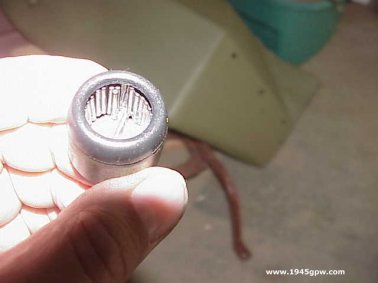
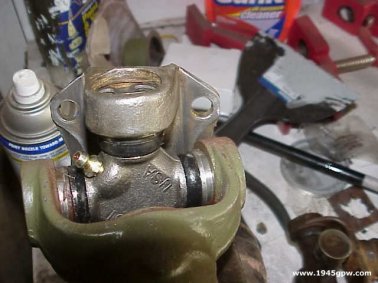
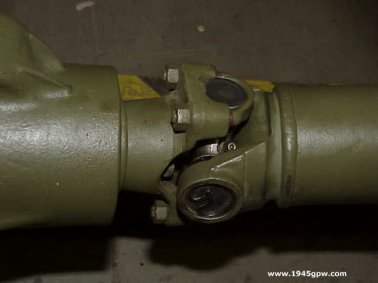
7. New ujoints come with the retainer rings and a zerk fitting. REMEMBER to install the zerk with it pointing toward the shaft, otherwise you won't be able to get to it. Also, you want to make sure that the zerks are lined up the same side on the shaft, AND, it is on the same side as the yolk. |
|
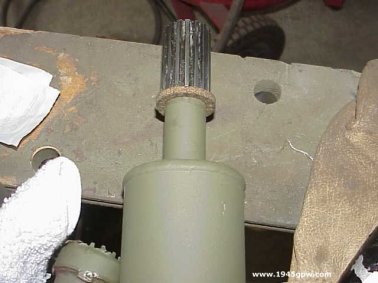
8. I added a new cork seal to the drive shaft. You can add a rubber one which will probably last longer, but I installed the cork one as to the specs. You have to place it on first before bringing the Yolk over the shaft |
|
9. One of the common problems is installing the new rings and the cups fall off and the little shafts inside the cup fall out of alignment. I suggest to take all of the cups off before installing and install one at a time. Otherwise, you might run into this mess. |
|
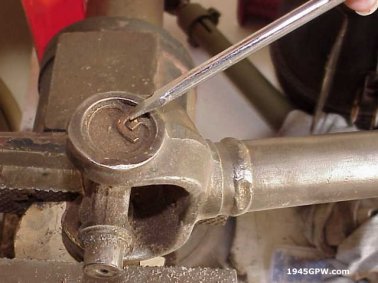
10. I shot some WD-40 in the rings of the yolks before trying to install. The cups will fit tightly, but they will give you resistance if you don't lube a little. Here you see on of the cups being pushed in with my Vise. I will repeat this process with the other side. NOTE: Keep your ujoint pushed into the cup so the bearing shafts won't move. |
|
10. Tom Wolboldt tip: While installing your u joints, make sure your zerk fittings are all on the same side for easy lubricating. Otherwise, you have to turn your propeller shaft to lube. |
|
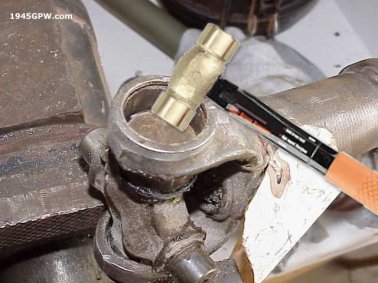
11. Pete Silfven Tip:Install the cups with the vise so they're flush, and then use a short socket to finish pushing them in. Do one side and install the snap ring, then do the other side. If the joint is tight, lay the cross across the vise again and tap the yoke to seat the cups against the snap rings. You'll notice that the hammer isn't used for installation except to free the joint up. This helps prevent any needles from being dislodged. |
|
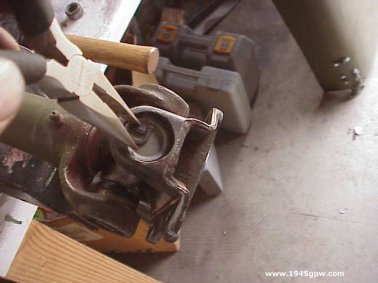
12. I used kneedlenose pliers to coil the clip, and pressing it into its slot. Once you have this one done, flip the shaft over and repeat the steps above |
|
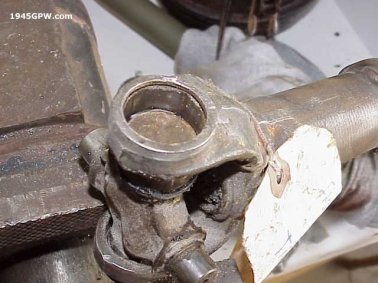
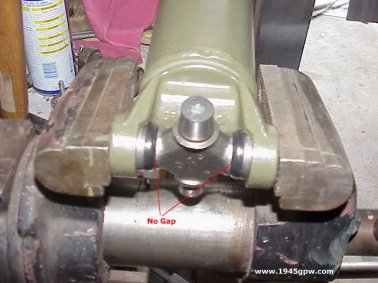
13. Once you have both clips in you will see there is no gap between the cups and the ujoint. If you have a gap, your clip will not stay in the retainer area. ALSO NOTE: the ujoint should move freely, if it is frozen, then you have a problem, most likely a bearing shaft fell, when you pounded it in, and it will need to be removed and replaced. |
|
14. Here you see I have finished and the ujoint moves freely. Also, you see I removed the cups from the other direction. That way they don't fall on the ground while I was working with these two. |
|
15. The installation of the ujoints is pretty basic once you get the cups installed on the clips side. Here you see it is a matter of tightening the U bolts on each side. Remember to keep the cups pressed on with your hand when installing. If they fall off, they will hit the ground and most likely fall out of place. |
