
The WWII Jeep Exhaust Heat Control Valve (Heat Riser) had its purpose for the G503 military vehicle and cold weather. Here we show you how to replace this very interesting piece of engineering.


|
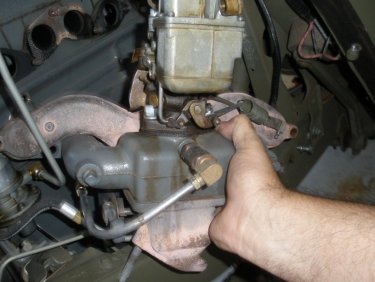
1. The Heat Control Valve is a neat piece of engineering for its time. To understand it, Click on this article. Here we will show you what you need to do to replace the Heat Control Valve (sometimes called a Heat Riser). First you need to remove your exhaust manifold. |
|
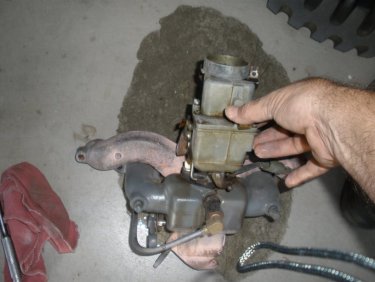
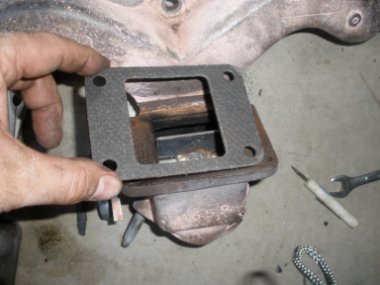
2. Seperate the exhaust mainfold from the intake manifold. (Four bolts on bottom). NOTE: Your Carbureator will probably still have fuel in it, so expect some spillage when handling it. |
|
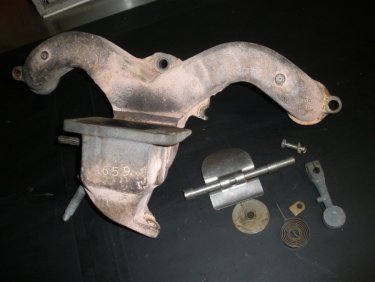
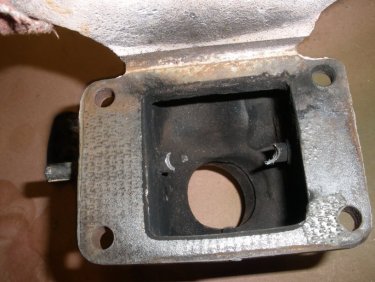
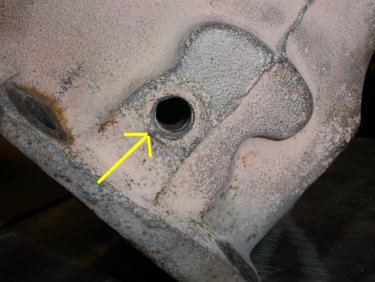
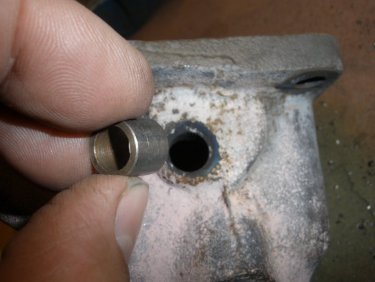
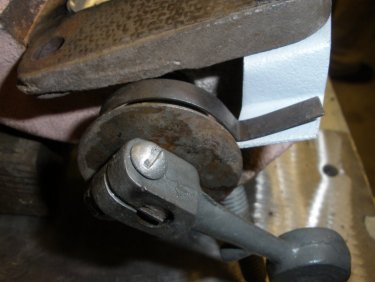
3. Here you see the parts needed to do the Heat Control Valve replacement. In this case, the current Heat Control valve is frozen in the exhaust manifold, so we need to remove it. |
|
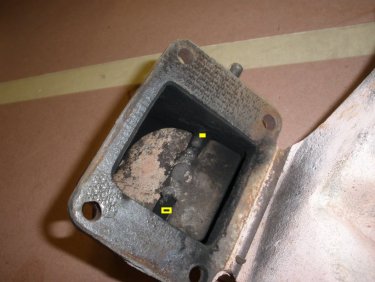
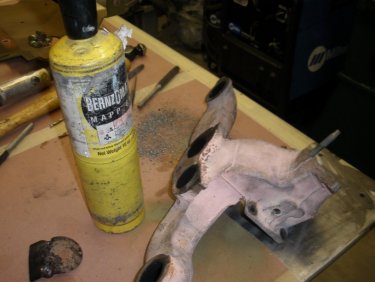
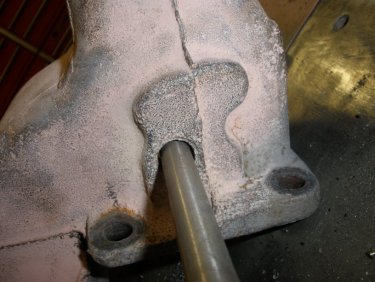
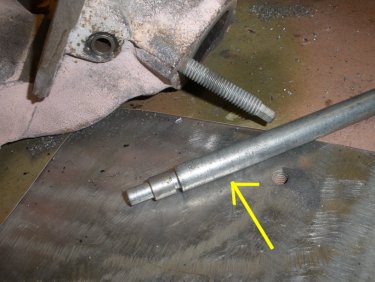
4. With my friend Harley (jeep is displayed on 1945mb.com) We plan to remove the center section of the flapper then heat the shafts and bushings on the side of the manifold and punch out. The yellow dots on the picture are where we punched a spot to drill the shaft out. |
|
5. With both sides of the shaft drilled out, we can heat the sides of the manifold and punch the shaft and bushings out. |
|
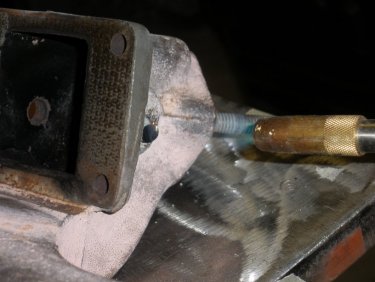
6. Here we use a little Mapp gas torch to heat the side of the manifold. NOTE: We used Welding gloves to hold the manifold because it will get hot, while the other person will punch out the shaft. |
|
7. For a couple of minutes we hit one side of the manifold with heat on both the outside and inside of the shaft. |
|
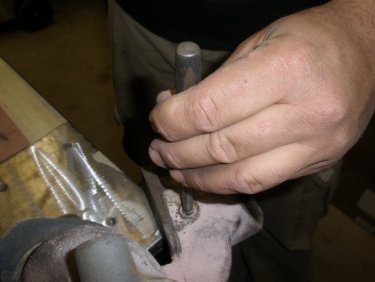
8. One side of the manifold heat control valve shaft hot, we took a large punch and punched the shaft out of the manifold. This should come out pretty easily. |
|
9. Although it looks like you have everything out, there is still a bushing that will most likely look like its part of the manifold. This bushing needs to be removed as well. So we heated it a little more (it was still hot). |
|
10. Now with the bushing hot, we used a larger punch and punched out the existing bushing. |
|
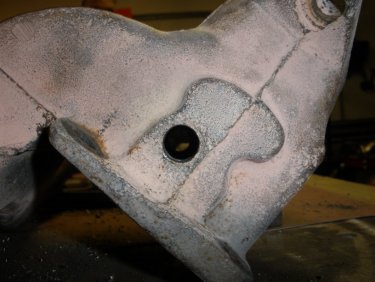
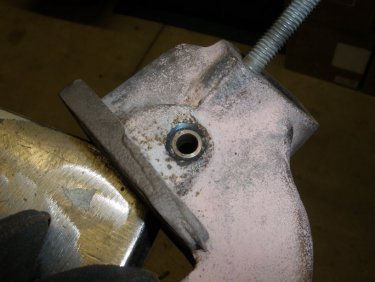
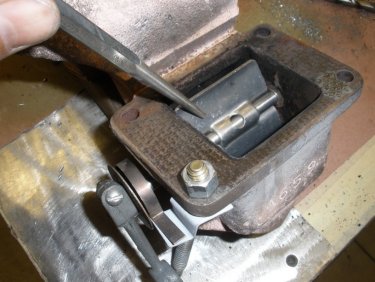
11. Now the manifold shaft hole is cleared out. REPEAT these steps for the otherside and remove the shaft and bushing as well. |
|
12. If you look closely into the manifold, the hole is groved to hold the bushing in place. |
|
13. We measured the new bushing included in the kit and it was slightly bigger than the this hole we wanted to insert it into. So we heated up this hole again to have it expand a little before installing it. |
|
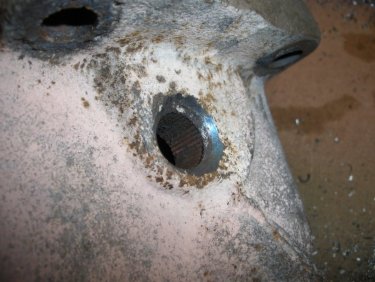
14. Harley had this great electrician's punch. The bushing fit around this perfectly so we could easily punch it into place. |
|
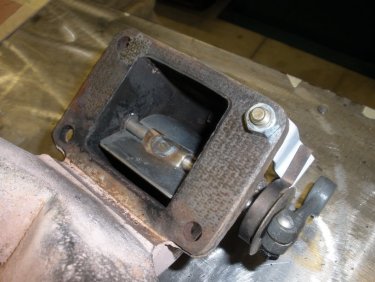
15. Here we have successfully installed the new bushing. REPEAT these steps for the other side as well. Note: When both bushings are installed, test your shaft to see that it moves freely. |
|
16. After installing the shaft see that it moves freely. We had to remove some burs in the bushing and we used some emery paper on the shaft to get it to move freely in the manifold. |
|
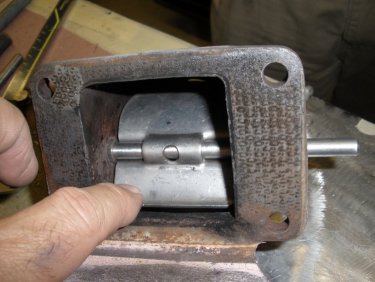
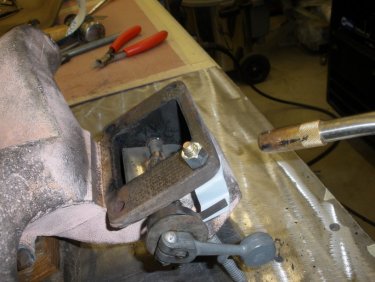
17. Now we need to emulate the heat control valve working. So we put the pieces in place starting the the armature and spring on the shaft. The link in the first paragraph above shows all the pieces and where they go if you are not sure. |
|
18. With everything in place, you will see that the flapper is loose. This will need to be welded into place. But first we want to make sure the position is correct. When the engine is cold the flapper should be open and gravity should have the arm pulled in a downward position. When the engine is warm, the arm will move up (from spring contracting) and the flap will shut close. |
|
19. After testing this positioning, we welded the flap to the shaft. Note: be sure your welder is not to hot to warp the shaft. |
|
20. Completed, woo hoo! To test we hit the manifold with some heat, and watched the spring contract, and close the flap. |
|
21. Add your manifold gasket and bolt on your fout bolts back to the intake manifold. |
